Digital & Embedded Systems
Tutorial 9 - Camera Interface
This tutorial will cover the basics of image capture and processing using the EyeBot with CCD camera. An image from the CCD (charge-coupled device) camera is the richest source of information available to the EyeBot. Therefore, intelligent use of this information can extend the robot's capabilities.
Image basics
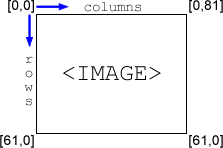
A digitized image is composed of many individual elements called pixels, or picture elements. Each pixel has a value, or set of values, associated with it which determine its color. For a black and white image, the pixel value is either a 0 or 1, where 0 represents black and 1 represents white. A RGB color image pixel has three values which determine the red, green, and blue components of the pixels color. The pixels which comprise the image can be stored in an array The convention for the EyeBot is
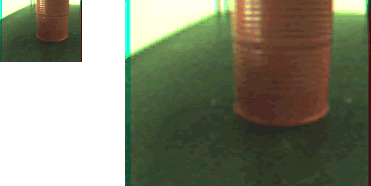
A sample image from the eyebot looks like
.ppm image format
The .ppm format is a simple image format used to store images from the Eyebot. We use the ASCII PPM format, where all data is clear text with white space as separators. The test images are type RGB color, 82x62 pixels wide, with max value 255. The format is like this: "P3 <width> <heigth> <depth> <pixel 1> <pixel 2> ... <pixel width*heigth>"To complete the lab it is suggested that you download these files
picture.c
lab9a.c
lab9a-pc.c
original.ppm
picture.c defines two types, BYTE, and colimage. These are now types which can be used similar to int and char.
#define imagecolumns 82
#define imagerows 62
typedef unsigned char BYTE;
typedef BYTE colimage[imagerows][imagecolumns][3];
colimage picture =
{
16,
255,
223,(continues)
lab9a.c is a simple program which will display the picture in picture.c.
#include <eyebot.h>
extern colimage picture;
int main(void)
{
LCDPutColorGraphic(&picture);
return 0;
}
lab9a-pc.c is a program which you can run on a pc to create a filtered .ppm image from the picture.c file.
To compile and run the lab9a-pc.c, first compile the picture.c file into an object file with the command
gcc picture.c -c
You can then compile the pc program with the command
gcc lab9a-pc.c picure.o -o lab9a-pc
To view the filtered image first run the compiled lab9a-pc, this will create a file called "test.ppm". If you are using Windows, use irfanview or gimp to view the .ppm image. If you are using Linux gimp works well. You can also use the MATLAB funtion ppmread to view the image. To do this, first download the file and place it in a directory where MATLAB can execute it, also place the picture file original.ppm in the same directory. Start the MATLAB engine. At the command prompt type
>> I = ppmread('original.ppm');
>> figure
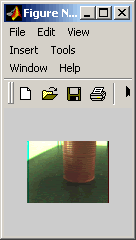
>> imshow(I)This should display the following figure
You can resize the figure in order to see the image better.


